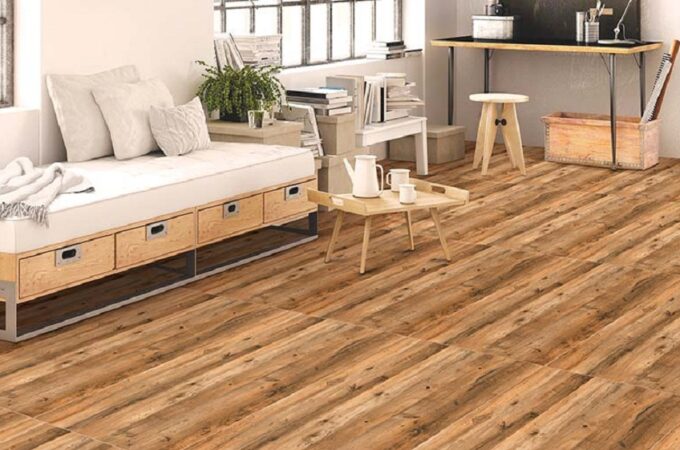
How To Install Self-Adhesive Vinyl Flooring In Kitchen?
Tips before putting vinyl flooring in your kitchen
- You will need to provide yourself with a box cutter to cut the vinyl floor and a good level ruler to draw the straight lines that will guide you during the installation.
- We recommend cleaning your old floor or covering it very well to avoid dirt and dust. This way, we will achieve that, for example, the adhesive strips stick better to the old paving.
- If your floor is not perfectly level or has different heights, it is vitally important that we use a levelling paste to eliminate unevenness and ensure that everything is of the same size. Never lay adhesive flooring on carpets, rugs or any unstable ground.
- Measure very well the room in which you are going to renew the floor. It would help if you remembered that you have to make several cuts in the corners and edges, so we always recommend buying 10-15% more vinyl flooring so that we do not lack material.
- You can also use a priming liquid that gives an extra fixation to the slats, tiles or rolls, and in this way, they remain more adherent to the previous floor.
- If you install vinyl flooring in a click system, you must buy an insulation base on which this type of vinyl kitchen flooring is installed.
- Avoid using solvent cleaning products on the vinyl floor or putting very hot objects on it so as not to damage it. If you have a persistent stain, use any special soapy floor cleaner for this type of PVC flooring, and if it doesn’t come off that way, you can use a little alcohol.
Once we have all this done and prepared, we can proceed to see the different types of vinyl flooring installations there are.
How to install self-adhesive vinyl flooring?
As in the previous installation systems, before laying adhesive vinyl flooring, do not forget to read the last piece of advice to prepare yourself. For this type of flooring, you will need at least 72 hours to lay it. Now we explain why.
It is essential to measure our kitchen (or any room) in square meters to be able to buy the necessary material. Also, as we always say, buy at least 10% more so you never run out, or you can save it in case you have to change a slat in the future.
Remember that these self-adhesive slats or tiles must be acclimatised for at least 24 hours before installation in the room where we will place them.
Also, ensure it is not too cold, as its adhesion system could fail in low temperatures.
What tools do we need for an adhesive vinyl floor?
- Self-adhesive PVC flooring
- Levelling paste or mortar
- Primer for self-adhesive vinyl flooring
- Roller
- cutter
Levelling and primer for floor
◊STEP 1
DO NOT FORGET! Especially for this type of vinyl floor, you must apply a levelling paste or mortar to avoid unevenness in the subfloor.
Apply this putty between the joints of the slabs, holes and imperfections of the previous floor and let it dry for 24 hours.
Joint levelling
Once you have the entire floor levelled, please wait for it to dry well and sand the paste so that the whole ground is smooth. Remember to clean the dust thoroughly with a brush or vacuum before going to the next step.
After levelling, sanding and cleaning the floor well, we will proceed to apply a primer liquid with a roller that will help us to fix our self-adhesive slats or tiles with greater security. We will let it dry for another 24 hours.
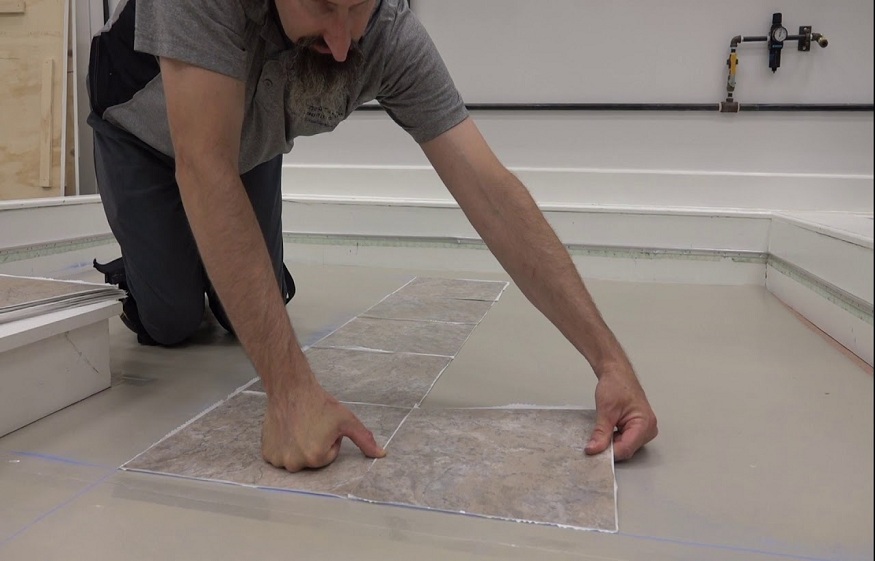
Install self-adhesive vinyl flooring. How to place it?
◊STEP 2
After the primer liquid has dried, we will glue the PVC floor starting as we saw with the floor in click, from left to right, in the direction of the window and always leaving the tiles uneven so that they are visually correct.
You can also start installing adhesive vinyl flooring from the centre of the room, drawing lines with the help of a ruler and a pencil.
Remember that this self-adhesive vinyl flooring has plastic strips to protect its fixing system. Remember to remove the protective paper before placing it.
Make the vinyl floor cuts with a cutter.
For the cuts, as in the other types of PVC floor, we will use a cutter with which we can easily cut the slats, marking the amount well and bending them so that they split along the line.
In the previous systems, we have not commented on it. Still, we can place these adhesive strips horizontally, giving us a feeling of spaciousness or vertically, making our kitchen feel more depth.
It is essential, as we have already said, to stick the self-adhesive floor with mild temperatures so that the glue strips are not frozen and perform their fixing function well.
Once the adhesive tile is in place, wipe it over with a forceful cloth to ensure that it has been fixed well and remove any air bubbles that may have been created by sticking it to the floor.
Joints and fixing of skirting boards
◊STEP 3
To finish; we can hide the joints between the vinyl floor and the wall with some putty or transparent silicone or the colour of the wall.
As in the click system, self-adhesive vinyl flooring expands and contracts with very cold or scorching temperatures. Therefore, you must leave a few millimetres as expansion joints.
If you have skirting boards, it is enough to apply a mounting adhesive to fix them again. If you have left the expansion joint we were talking about before with the skirting boards; you can easily hide it.